


I have seen a surge in picture-perfect craft projects for kids in recent years, thanks to social media platforms and resources like Pinterest. As an art educator, this makes me cringe a little. Don’t get me wrong, I love Pinterest for the way it has brought together makers of all kinds to share their ideas and inspire others. As a mom, I too have fallen prey to wanting to find the right art-making project that is “Instagram ready.” However, these product-driven art-making activities can have a way of bringing on frustration, uniformity, and children feeling like they aren’t making something the “right” way. On the other end, process-oriented art-making invitations can do just the opposite.
What is process-based art?
- Art that is focused on the process of making and the exploration of materials, not the final product.
- Art that has no step-by-step instructions.
- Art without a right or wrong way to create and make.
- Art that is directed by the child’s choice.
There are multiple benefits to this type of art-making, particularly for young children. Children learn to express themselves, take risks, problem-solve, predict, and plan. You might be reading this and think, “But what does this actually look like in real life, and how can I do it at home?” Process art-making actually requires far less preparation and hands-on facilitation than step-by-step crafts do. Think of it as creating a situation where you are inviting your child to participate in making. The materials are set up, there might be a quick guided exploration of how a certain tool works, and then they are off to create with their own process and creativity.
Some process-oriented art-making invitations might look like:
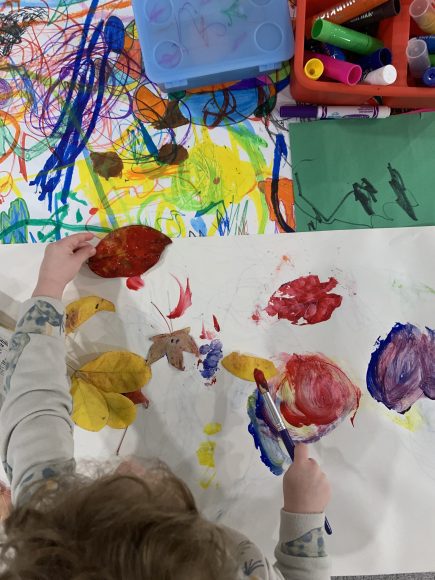
- Painting with a variety of paint and paintbrushes. Try different-sized brushes and experiment with new techniques like dragging, tapping, or swirling the brush.
- Exploring with clay, Play-Doh, or homemade dough. Add in tools like rolling pins, plastic knives and forks, and cookie cutters to experiment with texture.
- Painting with unusual materials like string, recycled materials, and toothbrushes. To extend a painting experience, reveal these items one at a time, so your child has ample time to explore each one.
- Painting with watercolors. Try out resist methods like using crayons or pastels on paper first and then painting over the drawing with watercolors. Or add salt to wet watercolor paintings and see what happens!
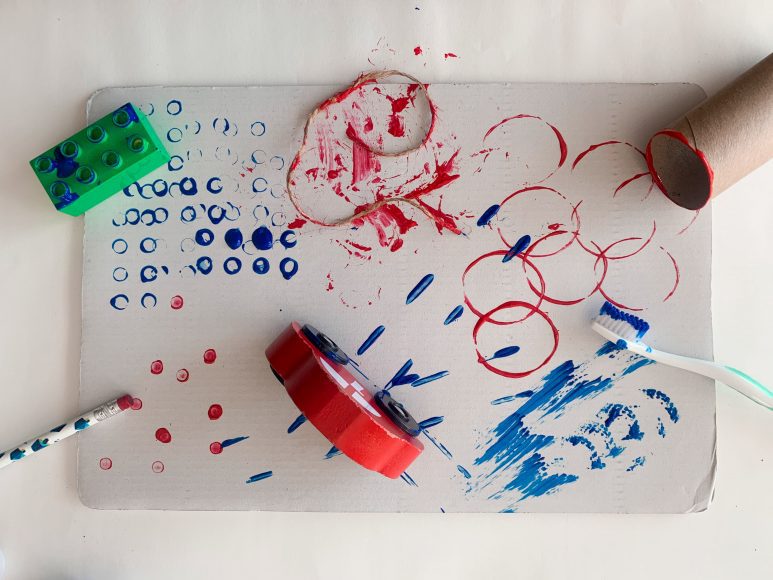
- Printing with sponges, stamps, and found objects like blocks, bottle caps, or natural materials.
- Stringing beads. Stringing beads onto pipe cleaners is easier for little hands and, as a bonus, can be shaped into new forms when complete.
- Weaving paper, string, or fabric through a paper loom, baking rack, or fence. Experiment with different types of materials to see how they weave through the chosen loom to create patterns.
- Making collages with recycled paper, tissue paper, glue, and scissors. Turn this into a mixed media activity by bringing in drawing materials or paint when the collaging portion is finished.

Process art is perfect for any age and stage. Here are a few pointers when you’re ready to dive into this type of making.
- Provide plenty of time for making. I’ve been guilty of the quick “Let’s squeeze this activity in before the next appointment!” This is not well suited to that kind of thinking. Give your artist ample time to explore and experiment.
- Remember, this is the child’s art, not yours. They want to mix all the paint colors together to make brown? Great! They want to use one tool and do the same thing over and over again? Awesome! All of the choice you are providing your child only aids in them developing their own creative process.
- Approach this as open-ended play. Provide them with a variety of materials and let them lead the way.
- Observe and point out what you see. Without making judgment, comment on what your child is doing. “I see you mixed red and blue paint together to make purple.” “I noticed you used the sponge over and over again to create rectangular shapes.” “I see you used the rolling pin to make your clay flat.”
Remember to have fun and keep on creating!


